A hop spider is one of the easier DIY projects I’ve come across in home brewing. It only requires about 15 minutes of your time and a few parts that can be picked up at the local home improvement super center.
I made a hop spider last year, and it immediately made a huge difference for me. Hop utilization became obviously better while at the same time less hop matter made it to the bottom of my kettle or into the fermenter.
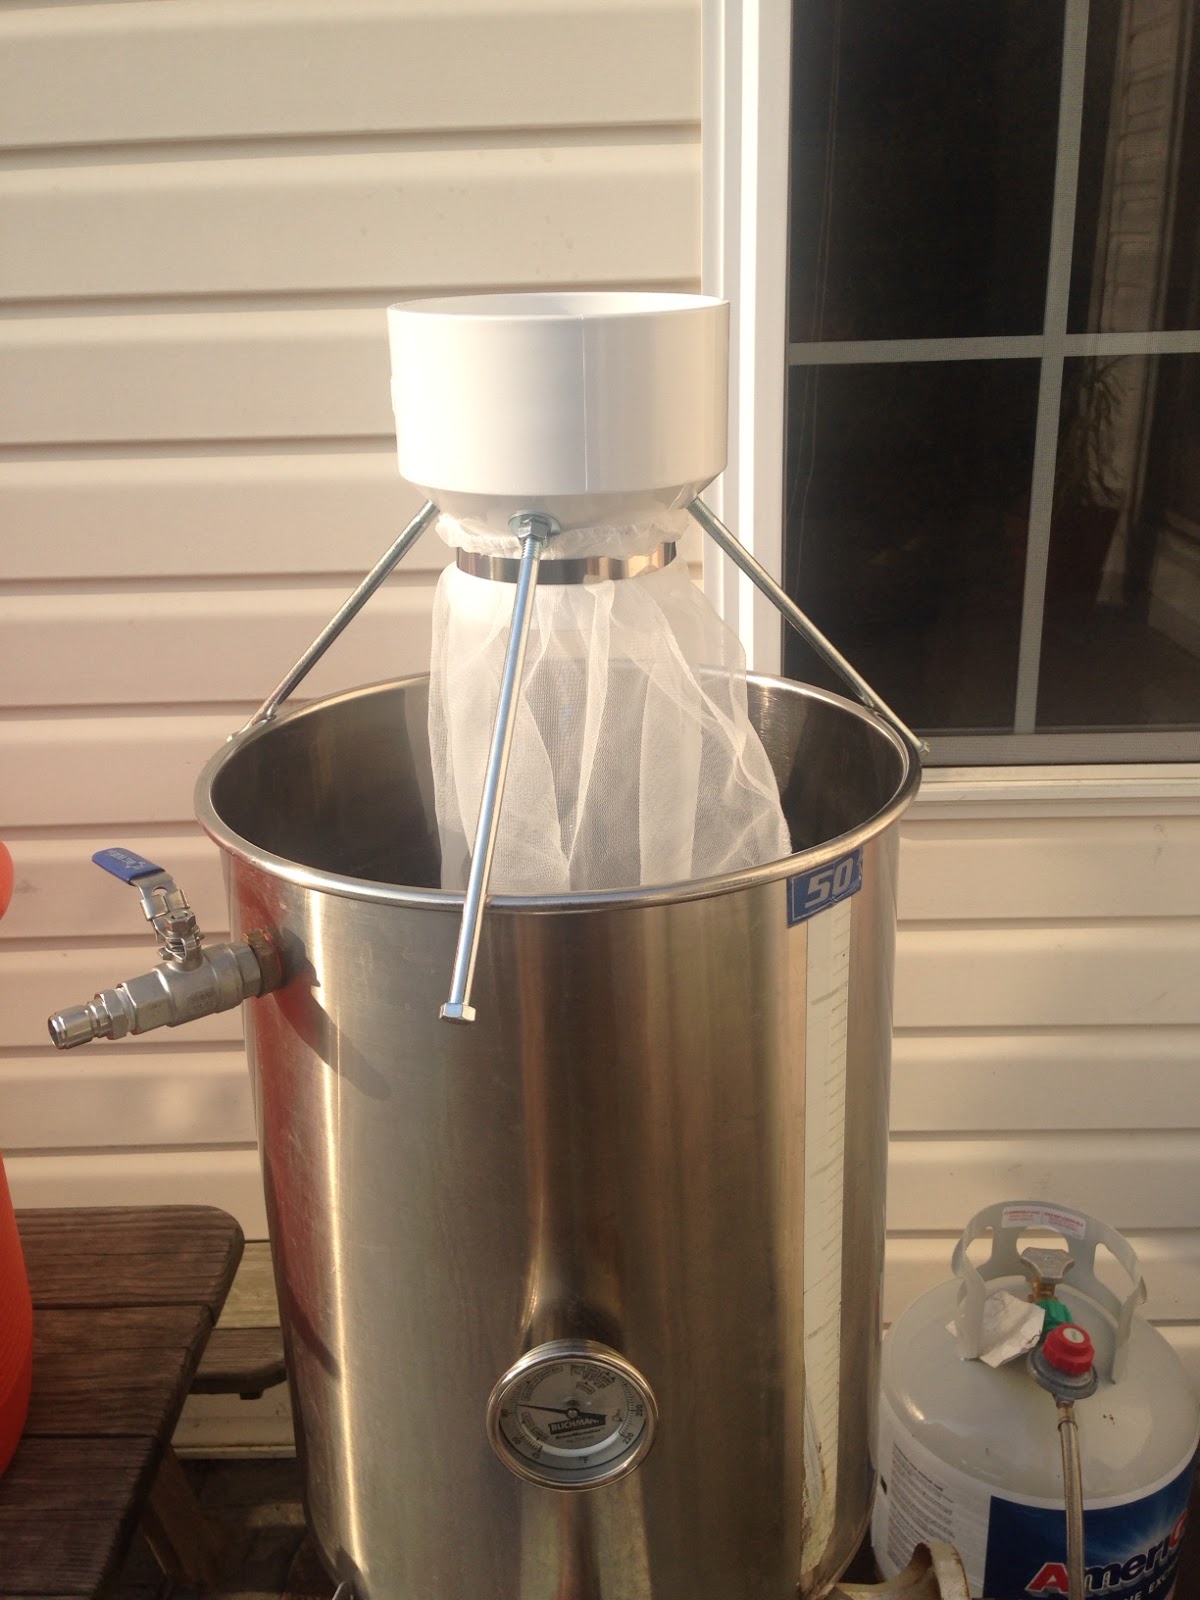
The purpose of this device is to give the effect of having free floating hops in the kettle, lots of contact between the hops and the boiling wort, while keeping the hops contained so that they can easily be removed. You get the benefit associated with using a hop bag, combined with the benefit of dumping loose hops directly into the boil.
This idea, of course, was not original. I found the idea/ design on the internet- probably HBT but I’m not sure.
My first iteration, which I used for several batches up to a few weeks ago, did have some minor design flaws. So when I neglected it in a rotting pile of spent grains after brewing my Nelson Cream Ale, I threw it away (rather than try to clean it), and seized the opportunity for a hop spider redux.
 |
| Hop Spider 1.0. Got the job done, but was clumsy and awkward. |
As much as this first version improved my process and final beer, it wasn’t perfect. The main flaw was that it sat very close to the surface of the boiling wort. So close that, as seen above, the temperature was enough to soften the pvc. It also didn’t help that the “legs.” while secure, were loosely mounted; they moved around too much. On one brew day, the legs collapsed, causing the entire device to drop into the boil. Ugh.
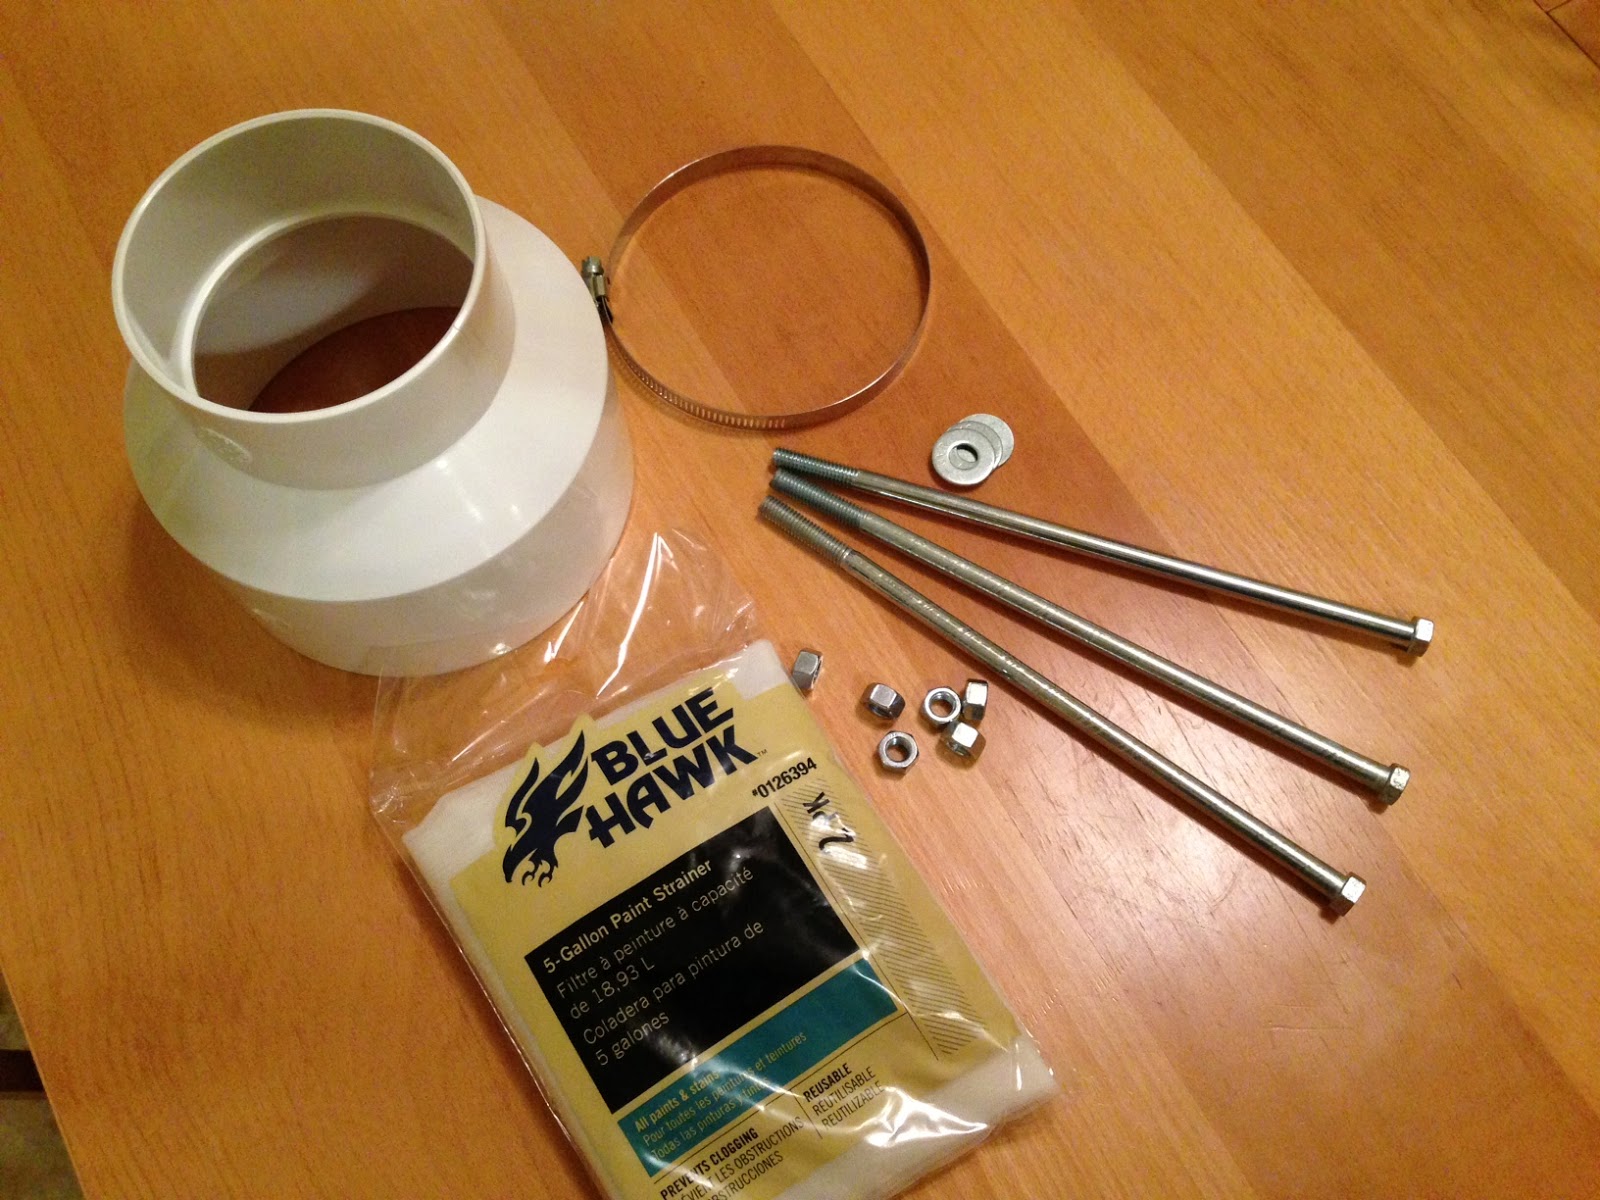
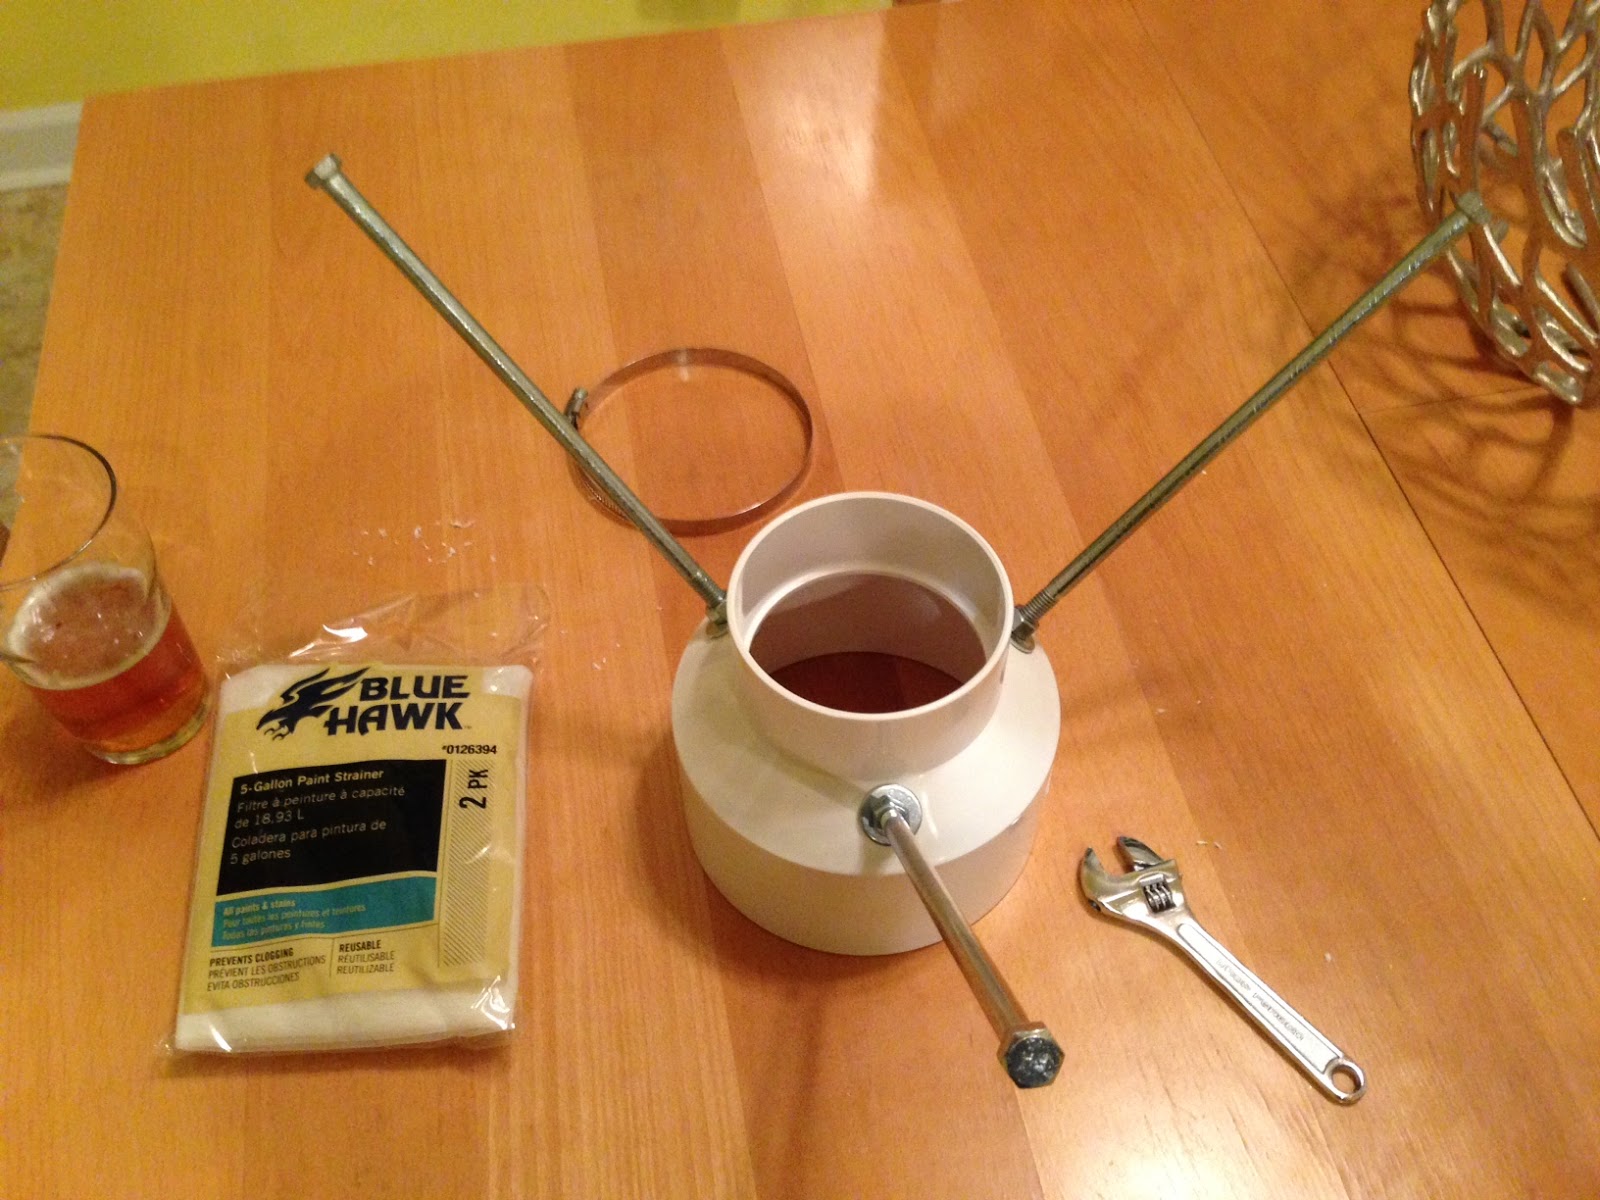
- (1) 6″ x 4″ pvc adapter coupling
- (1) 4″ hose clamp
- (3) 3/8″ diameter 10″ length hex bolts (zinc coated, but would like to replace w stainless steel)
- (6) 3/8″ hex nuts
- (3) flat washers
- (1) 5 gallon paint strainer bag
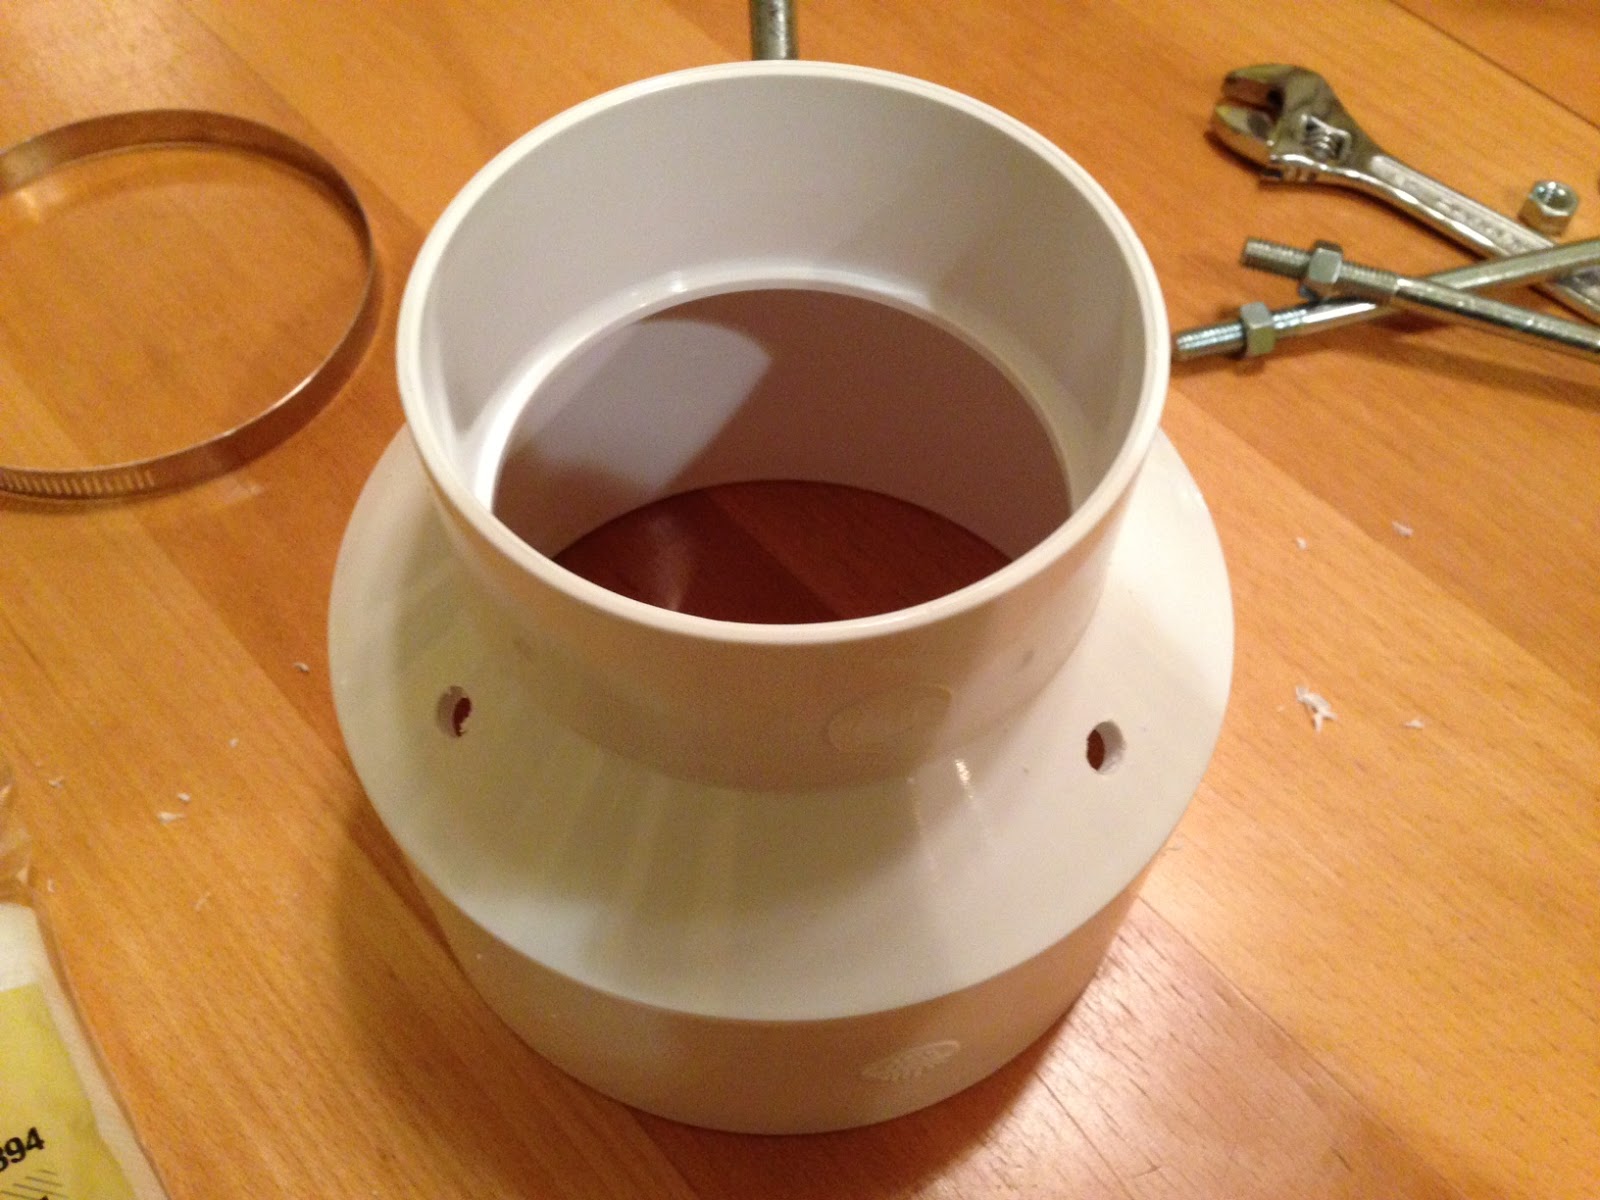
- Upsizing the pvc coupling. The 6×4 provides a wider mouth, easier for pouring hops into, as well as a thicker wall versus the 4×3 on 1.0.
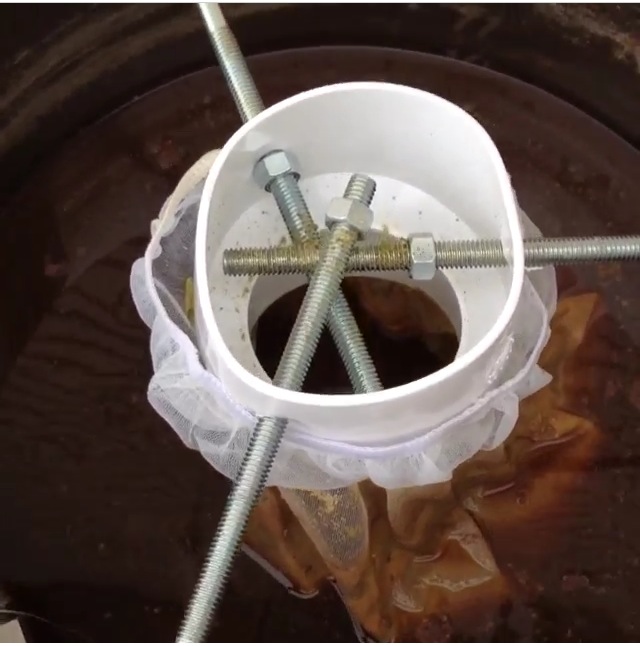
- Adding a nut and washer on the outside onto each bolt. Additionally, I used a 5/16″ drill bit this time, requiring the 3/8″ bolts to be threaded tightly through the hole in the pvc wall.
- Mounting the legs through the angled section of the pvc coupling.
1. Using 5/16″ bit, drill three holes (evenly spaced) into angled section of pvc coupling.
2. Thread one nut onto each bolt, then place one washer on each.
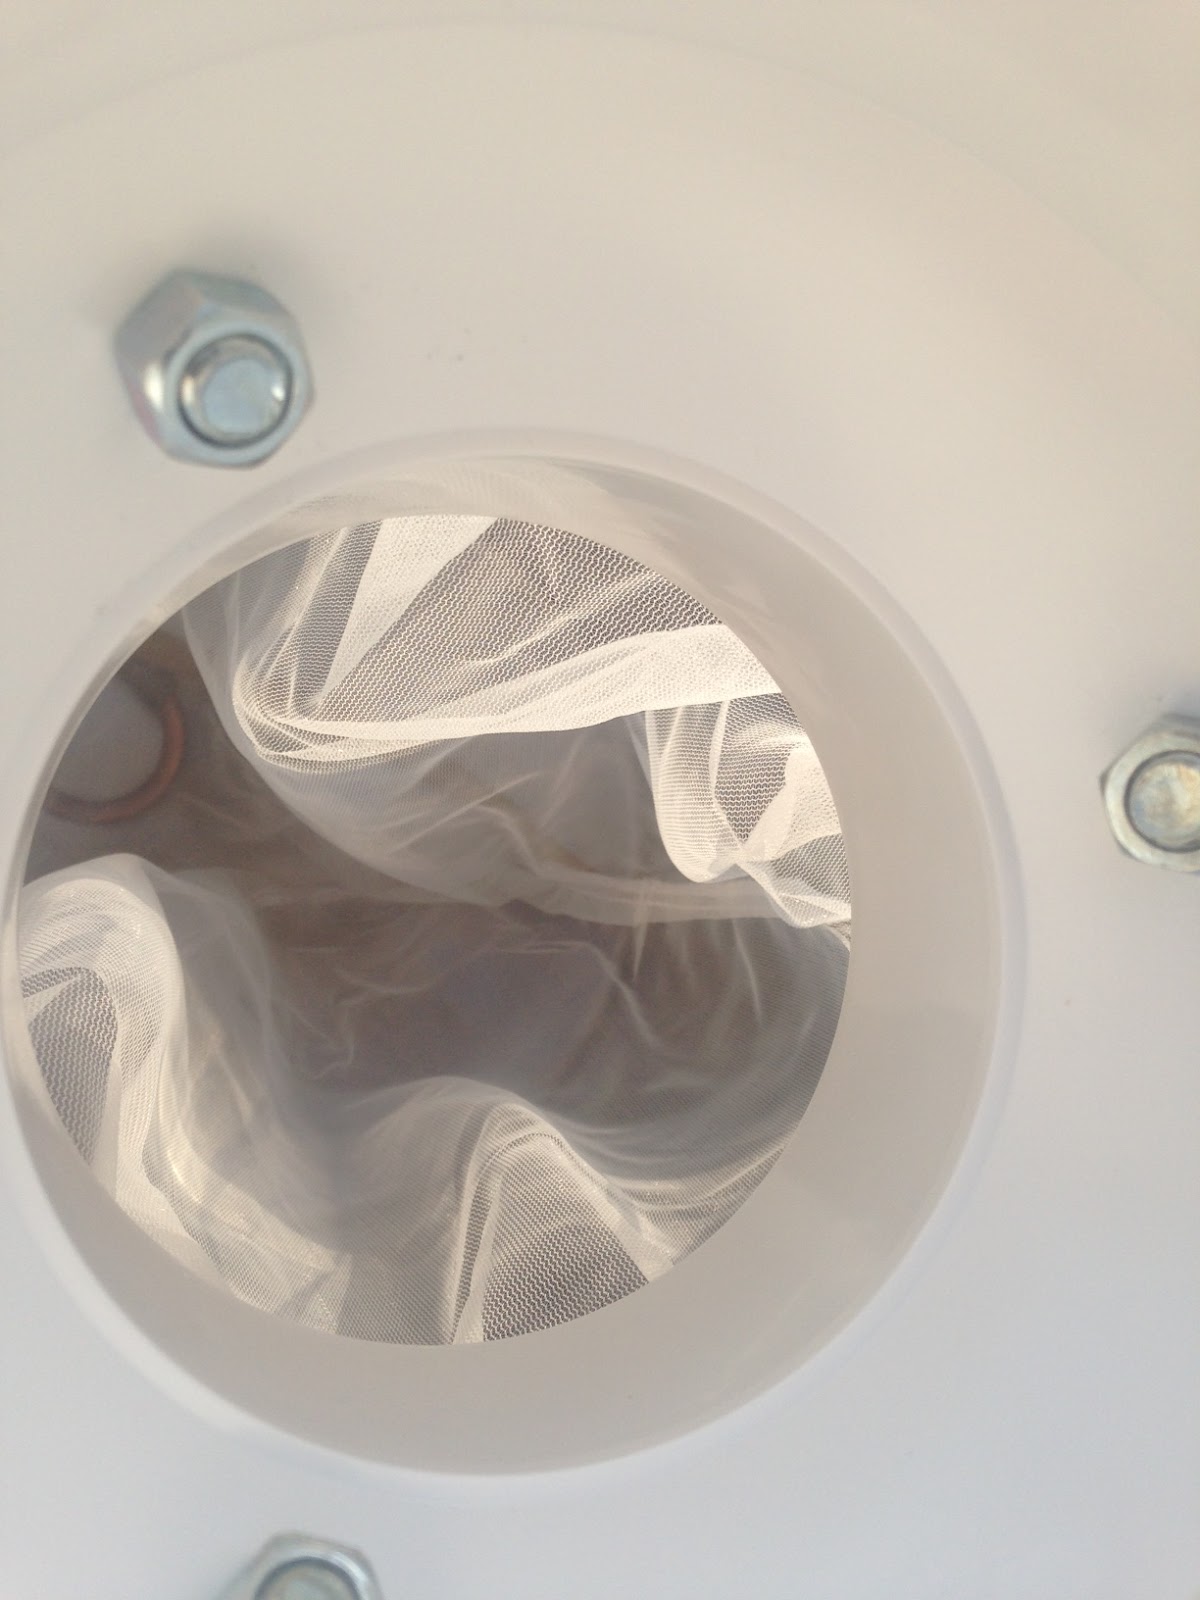
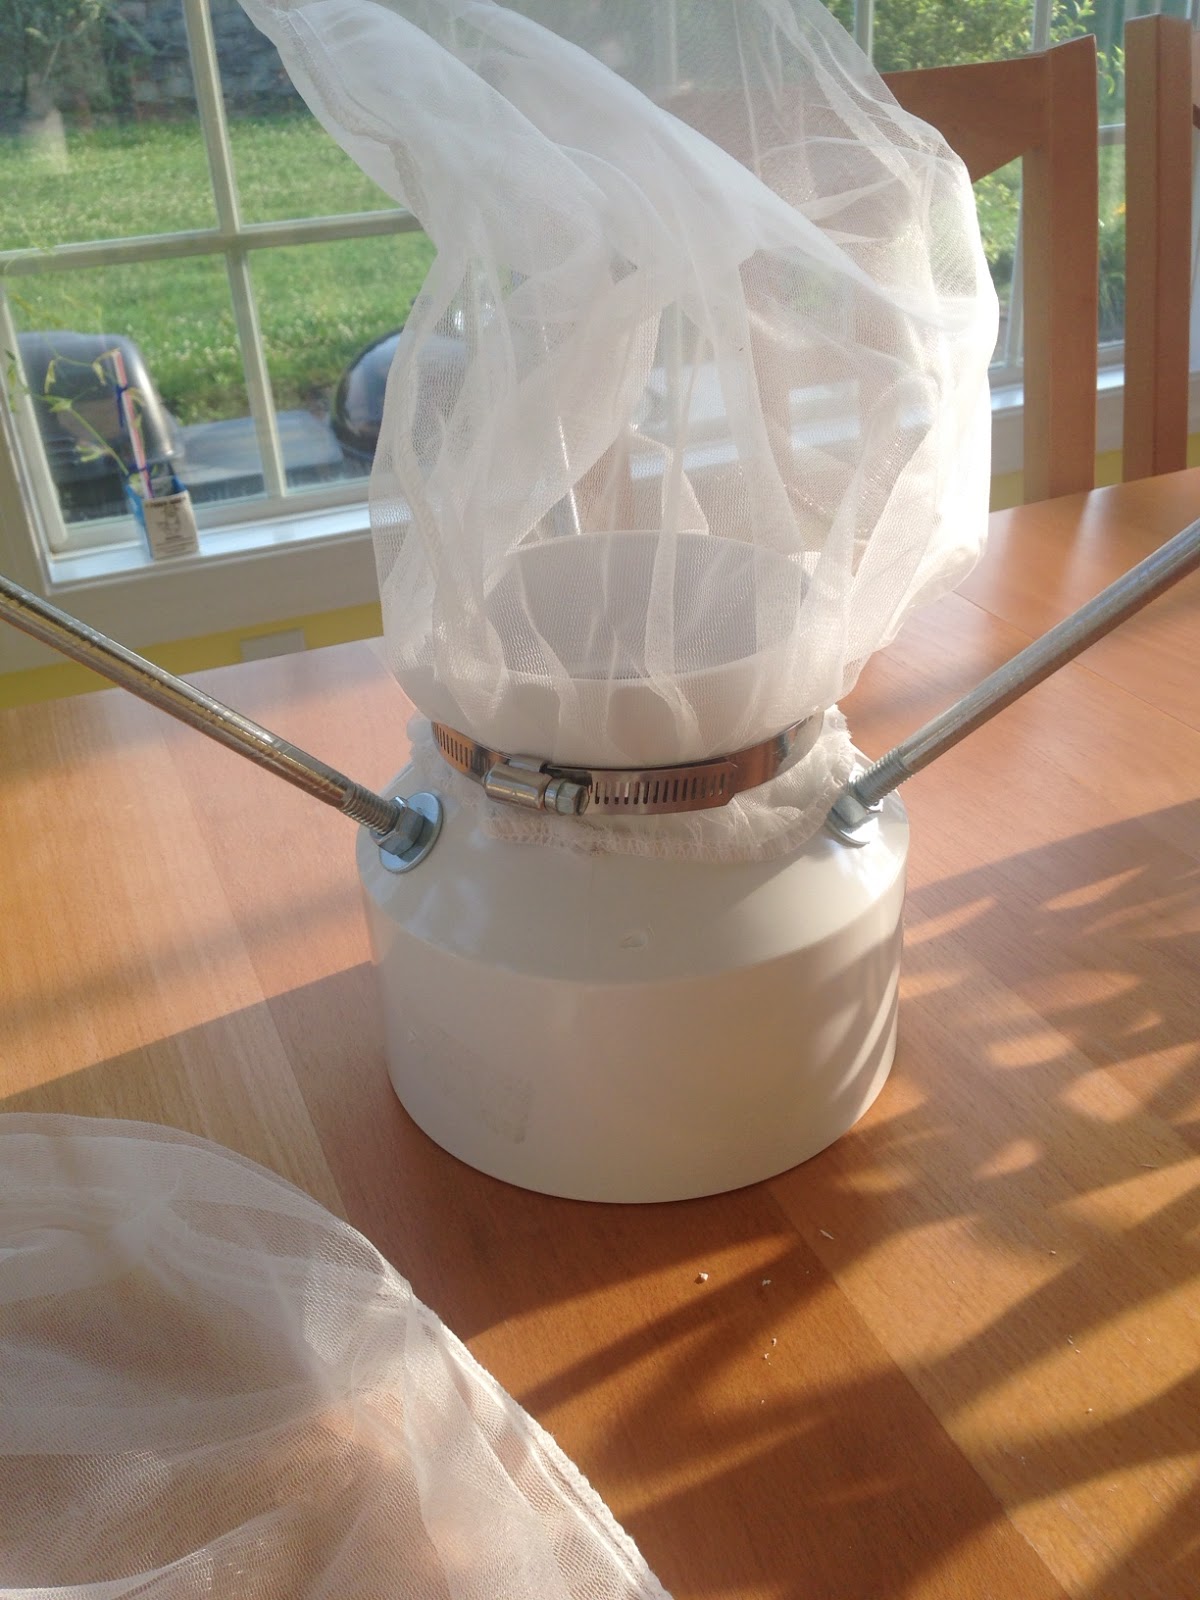
6. You’re now finished making your hop spider. Now use it.